Catalogs
Catalog
Overview
NEO works by creating indexes to your messages and storing them in a separate database called the catalog. Your messages are not stored in the catalog, just references to them.
Whenever messages are sent, received or updated in a message store, NEO automatically updates the indexes in the catalog.
Your
first catalog
A catalog is created when you start NEO for the first time, and whenever NEO is opened with a new mail profile. The catalog is created using a Catalog Setup wizard in several steps. The more messages you have the longer it will take to create your catalog, however catalog creation is only performed once.
Normally you would include all your message stores in the catalog. Also IMAP message stores can be added.
Multiple catalogs
You can have more than one catalog. Also you can open multiple copies of NEO Pro using different catalogs.
All messages from all messages stores in a catalog are unified - that is, organized together in the same Correspondent folder, as results of searches, and so on. If you want to keep message stores separate then create separate catalogs for them.
A few reasons to have more than one catalog:
· You want messages from some message stores to be organized in their own space (e.g., messages from previous employment or a different email account).
· You are a delegated user for another person's Mailbox in Exchange Server. NEO Pro requires that you only include a delegated Mailbox if it is the only Mailbox in the catalog.
Catalog
Basics
Open
a catalog
When starting NEO it will by default open the most recently used catalog.
You can manually open a catalog in following ways
1. Pick from the most recent used list after clicking the Application Button.
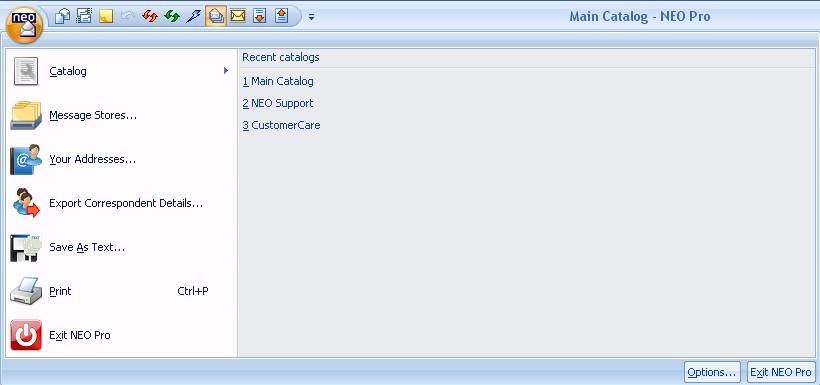
1. Click the Application Button, select the Catalog menu…
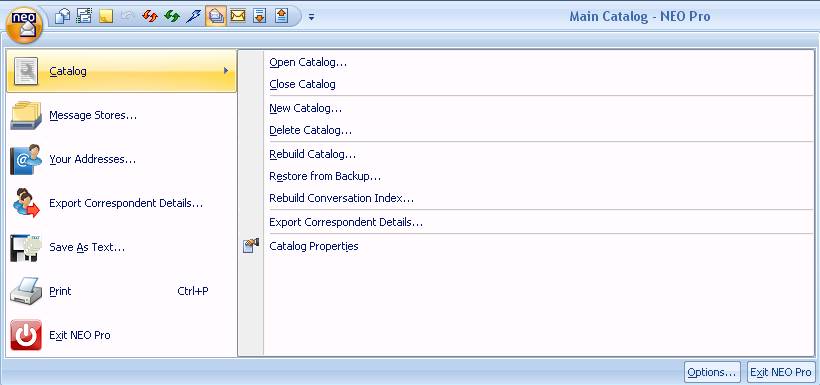
and click Open Catalog:
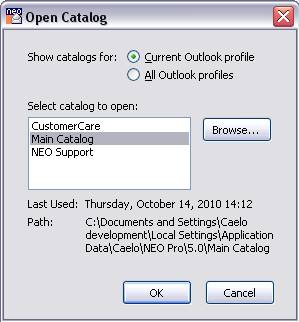
When the dialog opens you see the catalogs you have created for your current mail profile. You can choose to open up a catalog from another profile by selecting the option at the top.
3. Use a command line option to open a specific catalog. See section Ways to Start NEO in Getting Started.
Automatic
catalog opening
By default, the last catalog you opened is automatically opened for you next time you start NEO. If you don't want automatic opening to occur, you can:
1. Disable the option. See Tools menu | Options General tab.
2. Override the automatic open option by pressing the Shift key when clicking your NEO Pro desktop shortcut (keep Shift down until NEO is fully open).
3. Use a command line option to open a specific catalog
Closing
a catalog
You can:
1. Choose Close Catalog from the Catalog menu on the Application Button.
2. Open a different catalog.
Your Message Stores
Message
stores defined
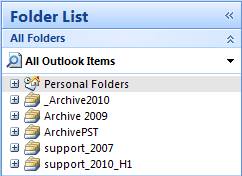
Message stores are repositories of messages and Outlook items. In Outlook, they are in your Folder List and look like this (in collapsed mode):
In NEO these same message stores appear in the NEO's Outlook view. There are five message stores types that NEO Pro organizes:
|
Exchange Mailbox |
If you use Exchange Server, this is typically where your messages are delivered. This message store is your Mailbox which is where your email data is stored on your company's server computer. |
|
Exchange Delegate Mailbox |
You can delegate access of your Exchange Mailbox to others. When you do, it appears in their Folder List just as though it is theirs. This message store is located on your company's server. |
|
Personal Folder (PST) |
Sometimes known as PSTs, Personal Folders, or Data Files, these are typically stored on your own computer. You create these in Outlook to improve Outlook performance. |
|
Offline Folder |
These are special Exchange user variants of Exchange Mailboxes that contain messages you have designated to synchronize for offline use. These are automatically handled by NEO when you are in offline mode. Cached Exchange Mode in Outlook 2003 makes extensive use of Offline Folder files. |
|
IMAP folders |
When adding an IMAP email account (such as Gmail) to your Outlook system, you will find the online IMAP folders in your Outlook Folder list. These can be organized in your NEO catalog. |
Moving
or closing your Outlook message store (Personal Folder, PST)
If you move an Outlook message store that is organized in NEO, Outlook changes its internal identifier. When you next start NEO, NEO will then not be able to find it. To make it visible within NEO again you will need to remove it and re-add it (see next section).
If you close an Outlook message store in Outlook you will need to remove it from NEO too (again, see next section).
Adding and removing
message stores
You can only add message stores that are in your current mail profile.
Note: If you change the message stores that are in your Outlook profile, you must restart NEO (the message stores available to NEO are only determined when NEO starts).
You explicitly add or remove messages stores via Catalog Properties by clicking Message Stores on the Application Button menu, or when you create a catalog.
Here is the how you choose catalogs when creating a catalog:
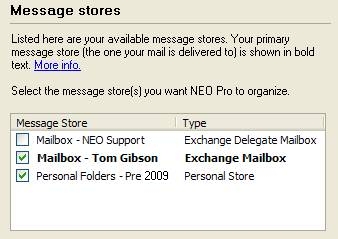
Check the message stores you want included, and uncheck those not to include in NEO. You can add or remove message stores from your catalog at any time.
You don't need to add/remove offline message stores explicitly. When you go offline in Outlook, with or without Cached Exchange Mode, NEO will automatically organize your offline store.
You can choose from message stores in your mail profile. If you want to include message stores not in your profile, you must add them to your profile first.
Set a time limit
for older messages in the Catalog
You can keep older messages out of NEO’s catalog by setting a time limit by going to the Miscellaneous tab under Tools | Options.

Messages older than the selected date will be excluded from NEO’s catalog independent how or where they are organized within the Outlook system.
Changing this date will force a full synchronization and update of the word index.
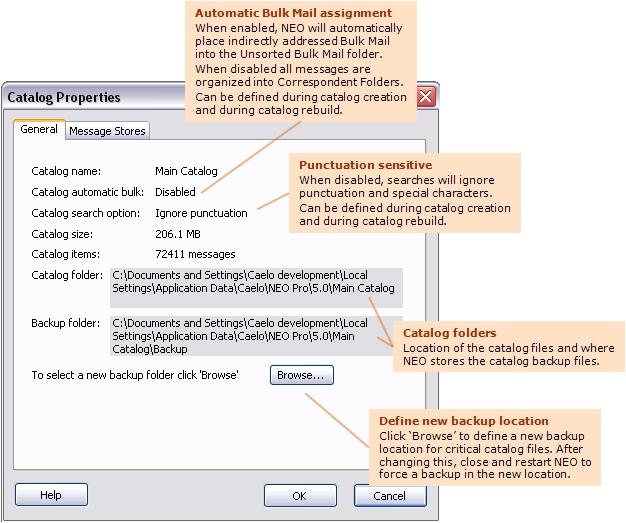
Catalog Properties
Use Catalog Properties to review information about a catalog, and to add/remove message stores from a catalog.
General
tab
Messages
Stores tab
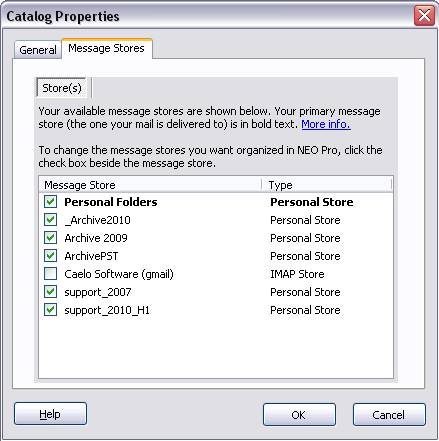
You will only be able to choose more than one message store. Message stores
that are delegated into another Exchange Server's Mailbox must be alone in their
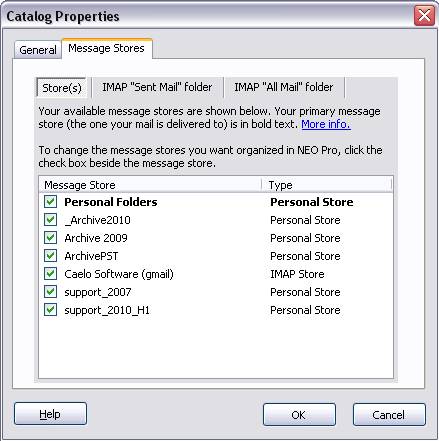
own catalog. When including an IMAP message store two additional tabs are
available to identify IMAP specific folders.
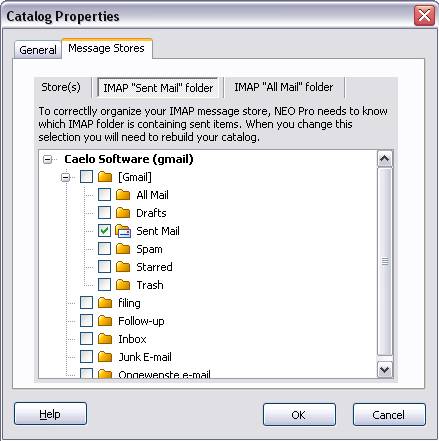
When including an IMAP message store is it necessary to indicate the IMAP folder containing Sent Mail.
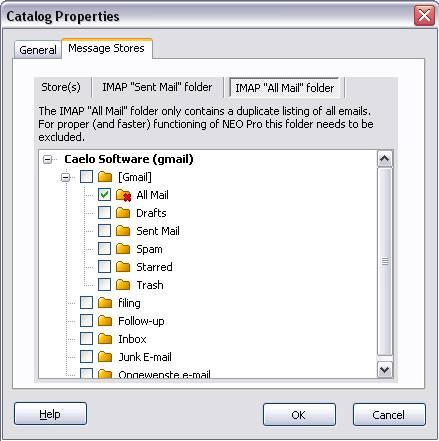
For the IMAP message store it is possible to exclude the All Mail folder to avoid duplicate emails within NEO (depending on the on-line IMAP folder organization). When selected, these emails will be completely excluded from NEO. To make them visible again within NEO, deselect this folder.
Creating
and Deleting Catalogs
Creating
a New Catalog
You can create as many catalogs as you like.
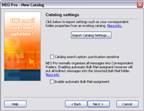
You create catalogs using the New Catalog wizard. Click File menu | Catalogs | New Catalog to start it. The New Catalog wizard also starts automatically the first time you run NEO, or when you open a mail profile that you haven't yet created a catalog for.
The New Catalog wizard consists of seven easy steps. You can cancel or go back and edit your settings at any time - catalog creation doesn't start until the final step.
|
|
Step 1 |
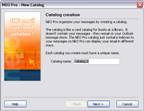
Best to enter something descriptive that describes what's in the catalog (e.g., Pre2000 Messages). The name must be unique across all your catalogs. |
|
|
Step 2 |
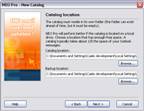
The default location for your catalog is the same general area of your Application Data into which your Outlook personal folders are stored. You can put it wherever you like where there is enough disk space available. Default backup location is <catalog location>\Backup. You can choose a network drive or even a memory drive (as long as the memory drive saves and restores its content upon system shutdown/restart). When you place your catalog on a memory drive, make sure to place the backup on a different location. It's faster to store it on your local computer where a memory drive will be fastest. Note that by default, like Outlook, the catalog is stored in the non-roaming (user specific) section of your computer. |
|
|
Step 3 |
· You can import your settings from a previous catalog of any version (e.g., v2, v3, v4, v5). · You can define whether searches take punctuation and special characters into account or not (default is to ignore punctuation and special characters). · Also here, you can enable the automatic Bulk Mail assignment for indirect messages. See below for further explanation. |
|
|
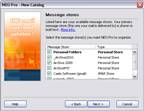
Step 4 |
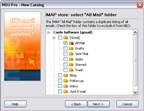
Normally you would select all message stores for a seamless organization of all your messages. Note: when including an IMAP
message store, two additional wizard screens will appear after step 5: step
5a and 5b. |
|
|
Step 5 |
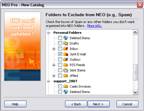
Identify if you have folders that capture Spam (junk mail). Microsoft Outlook and many spam-detection programs automatically funnel spam-looking messages to Outlook folders. Messages contained in the spam folders you designate are not included in NEO. You can change this at any time within NEO. |
|
|
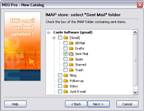
Step 5a |
Select the IMAP folder containing Sent Items. Step 5a will only show
when including an IMAP message store in step 4. |
|
|
Step 5b |
Optional the IMAP folder containing “All Items” can be excluded from NEO to avoid duplicates – this is depending on how the on-line IMAP folders are organized. You can change this at any time within NEO. Step 5b will only show when including an IMAP message store in step 4. |
|
|
Step 6 |
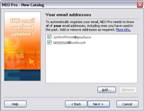
NEO needs to know which email addresses are yours. Note that NEO needs to know all your addresses - even ones you don't use any more. NEO attempts to determine your addresses automatically. Add to or remove from this list. |
|
|
Step 7 |
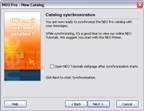
Now that all the information is collected, click Next to start the synchronization process. A progress dialog will appear. It's an ideal time to take our NEO Tutorials. To do so, leave the checkbox checked. |
Catalog Settings

In here three settings determining Catalog configuration can be chosen:
1. Import settings from a previous catalog
2. Enable punctuation and special characters in searches (default: ignore punctuation)
3. Enabling the automatic Bulk Mail assignment for indirect messages (default: disable automatic bulk mail assignment)
Importing previous
Catalog settings
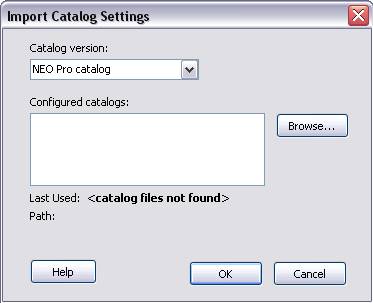
If you are upgrading from a previous version of NEO, or you want to create a new catalog similar to an existing one, you can carry-forward the settings into your new catalog.
The settings imported depend on the version of the catalog you are importing:
NEO 2 Your Search folders are not carried forward. Neither are the settings that determines which folders are Hot (except that Correspondent and Bulk Mail folder Hot setting is carried forward).
NEO Pro 3 / 4 All setting are carried forward.
The settings are imported into the new catalog. The catalog the settings are imported from is unaffected.
Choose the Catalog version then either select from the list or browse to the catalog location (highlight the file named CatalogConfig.xml).
Enabling
punctuation and special characters during searches
Default behavior of searches within NEO is to ignore punctuation and special characters during searches. With this option users can define to make searches sensitive to punctuation and special characters. Also when NEO rules need to be sensitive to special characters in the subject line, this option needs to be enabled. Once a catalog has been created this option can always be changed by rebuilding the catalog from the File | Catalog | Rebuild Catalog menu.
Enabling automatic
Bulk Mail assignment for indirect messages
By default NEO Pro is classifying all messages into your Correspondent Folders. As such the Unsorted Bulk Mail folder on the Bulk Mail tab will be empty.
However, if you like NEO to automatically classify all messages addressed indirectly to you (like e-zines, newsletters, and so on) as Bulk Mail you can enable this here. If selected, NEO will organize all these messages during catalog creation under the Unsorted Bulk Mail folder on the Bulk Mail tab. From here you can (and should) re-organize them into their own Bulk Mail folder or re-classify them as Correspondent.
This catalog setting can be verified for the open catalog by clicking the Application Button and selecting Catalog | Catalog Properties.
After creating the catalog, this setting can be changed during a Catalog Rebuild (see below).
Deleting
a Catalog
When you delete a catalog only the NEO information is deleted. Your messages will remain.
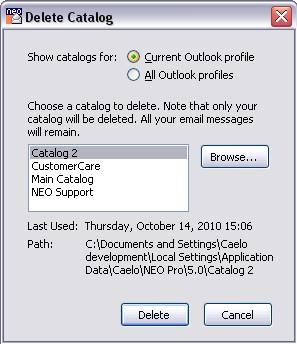
1. Click Application Button | Catalog | Delete Catalog.
2. Choose catalog to delete. You can select a catalog from your current profile or all profiles. If you do not see your catalog in any profiles, click Browse to locate it.
Catalog
Maintenance
Rebuilding
a Catalog
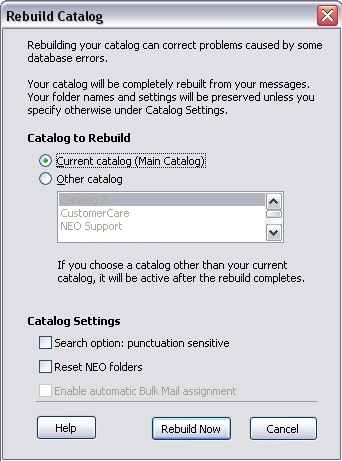
Sometimes it's necessary to rebuild your catalog, for example when one of your database records gets corrupted after a power failure. Note that you should always shut NEO down normally to help prevent errors such as these. You can rebuild by clicking the Application Button and selecting Catalog | Catalog Rebuild.
It is normally not necessary to rebuild your catalog to improve performance. You should only need to do it when advised to.
The rebuild process completely rebuilds your catalog from your messages. All your folder names and settings will be preserved unless you specify differently. Rebuilding your catalog can take almost as long as it took to create your catalog in the first place.
You can choose to build the current catalog or choose another catalog.
You can also choose to change the Catalog Setting for Search Option and Automatic Bulk Mail Assignment. To change setting for Bulk Mail assignment, first select Reset NEO Folders (NOTE: this will reset all changes you have made to your NEO folders like combining Correspondents or defined Bulk Mail folders; also, this will reset and remove all defined NEO Rules). Alternatively, you can create a new catalog to disable or enable the Automatic Bulk Mail Folder assignment. When rebuilding without changing this setting, the original defined setting is used during the rebuild.
Rebuilding
Conversation Index
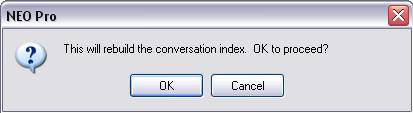
Sometimes the Conversation Index need to be rebuild (e.g. when conversations are not properly grouped together anymore). This can be done by clicking Application Button | Catalog | Rebuild Conversation Index and click OK.
Restoring a Catalog from Backup
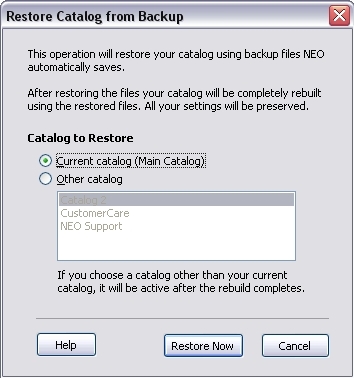
You can use the Restore from Backup feature to overcome a data problem with your catalog.
As a safety precaution, NEO backs up critical catalog files to a folder called Backup in your catalog folder or as defined during catalog creation. The Restore from Backup feature uses these critical files to completely rebuild your catalog from the saved files. You can find current backup location by going to Application Button | Catalog | Catalog Properties.
To restore your data:
1. Click Application Button | Catalog | Restore from Backup.
2. Choose catalog to restore.
Backing
up and restoring the catalog
The catalog contains information you have entered about your messages such as Correspondent and Bulk Mail properties, your Hot folders and so on. Even though you could always recreate your catalog from scratch if it got corrupted, you would lose some of the configurations you have made.
NEO
automatically backs up key data files
At least every three days NEO backs up key data files to the backup location specified during catalog creation (default backup folder is <catalog location>\Backup). You can define a new backup location on the Application Button | Catalog | Catalog Properties screen where also current backup location is shown. From these key files, your catalog can be completely rebuilt without any information loss.
You can use Restore from Backup (Application Button | Catalog | Restore Catalog menu) to restore and rebuild your catalog. It will automatically use these previously saved files.
Backing
up the catalog manually
While the above offers some protection in restoring to correct data corruptions, it offers no protection against accidental deletions, hardware failures, and the like.
You may wish to back up the catalog manually to an external location. You can choose to simply back up the key data files from your catalog (or backup) folder(s), or you can choose to back up all the files from your catalog folders. If you choose just the key data files you will need to also then perform a catalog rebuild operation after restored, whereas if you back up all the files in your catalog a catalog rebuild is not necessary.
There are four key data files to back up. The current versions exist in your catalog folder, and older backup versions exist in the backup folder. The files are:
· CatalogConfig.xml
· NAD.dat
· NFL.dat
· NSB.dat
Restoring
the catalog from a manual backup
1. Close NEO.
2. Restore the files you backed up to your NEO catalog location.
3. If you restored just the four key data files, you must also do a catalog rebuild.
Locating
and moving the catalog
Where
the catalog is stored
The catalog is stored in a folder of your choosing. To find where the current catalog is stored, view the catalog properties. Click Application Button | Catalog | Catalog Properties.
A quick way to locate where your default catalog location is to start creating a new catalog (click Application Button | Catalog | New Catalog) then click through the first panel and you will see the default location. You can also browse from there. You can click Cancel to stop the New Catalog wizard.
To find all your catalogs on your computer, you could also do a Windows Search and search for all occurrences of file CatalogConfig.xml.
Moving
the catalog
There is no command within NEO to move the catalog. However, if you wish to move it you can do so using these steps:
1. Close NEO.
2. Locate the catalog you want to move (see above).
3. Move the entire catalog folder and subfolders to your new location (it must not exist in the original location – if you copy it, delete it from the original location).
4. Start NEO. You will be notified that the catalog files are missing.
5. Click Application Button | Catalogs | Open Catalog. Select the catalog you want to open in the list then click Browse. Browse to your new location and select the file CatalogConfig.xml.